


Different Types of Bandages and Their Uses
Bandages are an essential medical supply for any first aid kit. They allow for the effective provision of wound care for a variety of different injuries and facilitate the wound healing process. A number of bandages are available, with different types intended for specific purposes and for application to specific body parts. Knowing which bandages to use on certain types of injuries is a vital part of administering first aid and ensuring that the wound is managed correctly. An incorrect application of a bandage can potentially lead to further harm of the patient.
Here we take a look at some of the main types of bandages that are used in the course of first aid and their specific use cases.
What is a bandage?
A bandage is a piece of soft, absorbent material that can be used to:
- Hold a dressing in place over a wound
- Support a splint
- Immobilise a wounded body part
- Compress a soft tissue injury
Though commonly used interchangeably with ‘dressing’, bandages are not intended to be used in direct contact with a wound.
Dressings are designed to be the primary layer applied to a wound to:
- Stem bleeding
- Absorb exudate
- Provide pain relief
- Prevent infection
Bandages, however, are primarily used as a secondary layer to hold dressings in place and further support the healing process.
What are the different types of bandages?
A number of different types of bandages have been developed across a variety of sizes, shapes and materials to treat a range of wounds and injuries.
Crepe Bandages (Gauze Bandages)

AeroCrepe crepe bandages, also known as a gauze bandage or roller bandage, are the most common type of medical bandage. They consist of a woven strip of absorbent material that can come in a variety of sizes.
Uses
A crepe bandage is incredibly versatile in that it can be used for a number of different applications, including:
- Holding a dressing in place
- Medium injury support (e.g. joint immobilisation)
- Compression
How to Apply a Crepe Bandage
- Ensure the body part you need to bandage is settled in a position that is comfortable for the patient
- Start by wrapping twice around the injury, firmly, (only unrolling a few centimetres at a time) to lock the end of the bandage securely in place
- Wrap from the middle of the body part/limb outwards in spiralling turns, ensuring that each new layer covers two-thirds of the previous turn
- Ensure that the dressing is totally covered
- Finish by wrapping the bandage around once more, using adhesive tape or safety pins to secure the end
Applying to Knees & Elbows
When applying roller bandages to knees or elbows, be sure to:
- Hold any dressing in place/support any strain or sprain
- Slightly flex the joint
- Wrap the bandage in a figure of 8, extending the bandage generously on either side of the joint
Applying to Hands
When applying roller bandage to hands, be sure to:
- Hold any dressing in place/support any strain or sprain
- Wrap twice around from the inside of the wrist, then take diagonal turns along the back of the hand up to the base of the little finger
- Proceed to wrap the around all fingers, leaving the thumb and fingertips free
- Wrap the bandage across the palm of the hand towards the outside of the wrist to complete a figure of 8
- Repeat this figure 8 several times, slightly shifting the position each time to prevent bunching
Compression Bandages

Compression bandages, such as AeroForm, otherwise known as a tensor, elastic or heavyweight conforming bandages, consist of a long strip of stretchable material that is used to support soft tissue injuries by applying pressure to the affected site. Compression bandage types can further be categorised as:
Short Stretch Compression Bandages
Typically used for the management of swelling, these bandages only allow for a modest range of extensibility (stretch). This provides a high resistance against external movement and muscle contraction.
Uses
Short Stretch Compression Bandages are suitable for managing:
- Lymphedema
- Edema (e.g. from a poisonous bite)
- Venous leg ulcers
Long Stretch Compression Bandages
Offering far more extensibility than its counterpart, this type of compression bandage can easily be applied to the contours of the body and provide very high resting pressure (pressure when the body is at rest).
This quality means that long stretch bandages are often used to relieve and support muscles, ligaments and tendons. Because of their high resting pressure, long stretch compression bandages may need to be removed during sleep.
Uses
Long Stretch Compression Bandages are suitable for:
- Holding dressings and splints in place
- Providing mild compression
- Supporting strains and sprains
Snake Bite Bandage

This injury-specific type of compression bandage is intended for use with the Pressure Immobilisation Technique – a preferred treatment for bites and stings that can result from a number of Australian animals. The Aero Healthcare Snake Bite Bandage is unique with special indicator markings that ensure the correct tension is being achieved when applying the snake bite bandage.
Uses
Snake Bite Bandages obstruct lymph flow thereby preventing the free circulation of venom, making it a suitable treatment for:
- Snake bites
- Funnel Webbed Spider bites
- Blue-Ringed Octopus Bites
- Cone Shell stings
How to Apply a Compression Bandage (sprained ankle)
- Ensure the start of the roll is facing upwards
- Ensure the ankle is positioned at approximately a 90-degree angle
- Start by wrapping the the bandage, tautly, around the ball of the foot, then the arch of the foot
- Once secured, pull the bandage diagonally across the top of the foot, circling it around the ankle, bringing it diagonally across the top of the foot again and then wrapping it under the arch in a figure of 8 pattern
- Continue to wrap the foot in a figure of 8 pattern, moving toward the heel on the bottom and up toward the calf at the top
- The bandage should cover the entire foot (excluding the toes) and extend about 10cm above the ankle
- Secure the loose end with tape or clips
Triangular Bandages

A triangular bandage, such as the AeroBand Triangular bandage, also known as a cravat bandage, is a multi-purpose cloth in the shape of a right-angled triangle.
Uses
Triangular bandages possess great versatility in that they can be used:
- As a sling (when unfolded) to support injured limbs
- As a normal bandage to secure dressings
- To splint broken bones
- To apply compression to swelling/bleeding wounds
How to Apply a Triangular Bandage (sling for forearm and wrist injuries)
- Hold the bandage vertically in front of the patient with the arrow of bandage pointing towards the injured side of the body
- Lay the bandage over the patient’s body with the long end draping over the shoulder and the arrow tip aligned with the height of the elbow
- Get the patient to hold their arm at a right angle across their chest, supporting it while you apply the triangular bandage
- Take the bottom of the bandage and drape it over the other shoulder
- Tie the ends of the bandage together in a knot, ensuring the elbow is well covered and supported
- Tuck any loose end of the sling in at the elbow
Tubular Bandages

A tubular bandage, such as the AeroForm tubular bandage, also known as a tube bandage, is an elasticated gauze bandage, woven in a continuous circle so as to provide uniform compression when applied to arms, legs, ankles and wrists.
Uses
A tubular bandage is suitable for providing moderate compression for applications such as:
- Immobilising joints
- Supporting joints during activity
- Hold dressings in place
- Reducing swelling
How to Apply a Tubular Bandage (arms and legs)
- Select a tubular bandage of adequate width depending on the broadest part of the limb that is being treated
- Ensure the bandage is long enough by cutting it to double the desired length and allowing an extra 3-4cm on both ends
- Cut two holes for thumbs if treating the lower arm
- Pull the bandage around the end of the limb, moving it up the arm or leg gently and evenly
- Pause before reaching the dressing, making sure that all excess length is pulled onto the lower part of the limb with none covering the hand or foot
- Hold the dressing firmly in place while pulling the bandage up the opposite side of the limb, keeping the bandage on the injury side stretched away from the wound area if there is one
- Pull the bandage over the dressing area while keeping the material stretched so as to not touch or move the dressing
- Ensure there is an excess of the bandage to sit atop the dressing area
- Fold the surplus length of the bandage over the first layer to form a double layer
Cohesive Bandages

Cohesive bandages are a type of compression bandage made of self-adhesive material, allowing you to securely wrap injured areas without the need for bandage clips or having the bandage stick to hair or skin. AeroBan Cohesive Bandages has the unique ability to stick to itself but not to the skin. Cohesive bandages also allow for free movement without bunching.
Uses
The high conformability and elasticity of cohesive bandages make it a suitable option for:
- Stabilising joints
- Holding dressings in place
- Supporting soft tissue injuries
First Aid Kit Essentials
With a range of bandages suited to a variety of different wounds, ensuring that your first aid kit is equipped with an assortment of bandage types and sizes, as well as a range of dressings and gauzes, allows the effective provision medical assistance in the event of injuries and accidents.
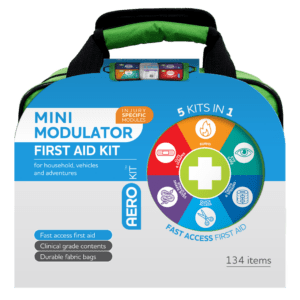 Introducing the NEW Mini Modulator - perfectly sized for taking on your next adventure!
